Blogs
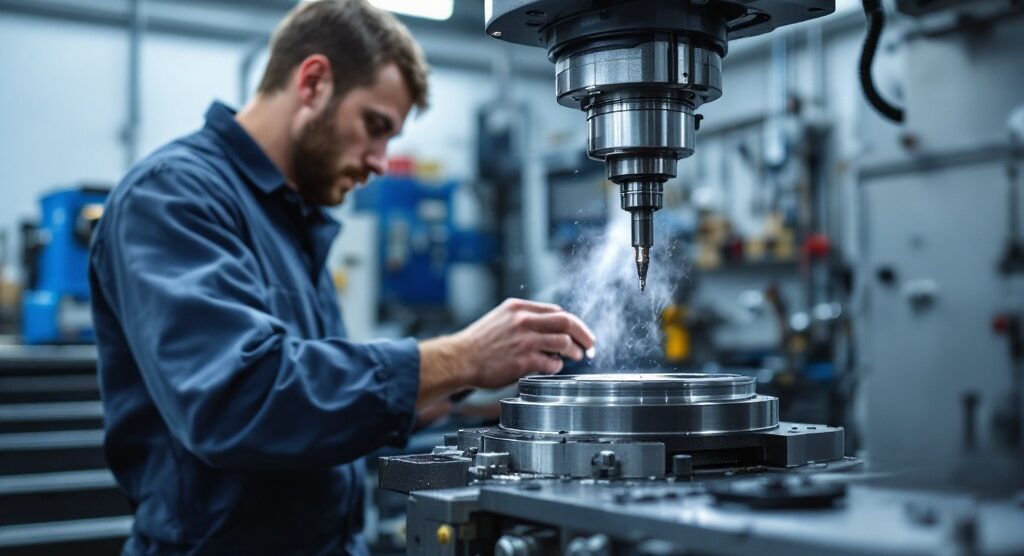
Invar Machining Tutorial: Techniques and Best Practices for Precision Work
Introduction
Invar, a unique alloy primarily composed of iron and nickel, is celebrated for its remarkable ability to maintain dimensional stability under varying temperatures, making it a vital component in precision machining applications across industries such as aerospace and electronics.
As organizations strive for innovation and accuracy, understanding the distinct properties of Invar becomes essential for procurement managers and engineers alike.
This article delves into the multifaceted world of Invar, exploring its properties, machining techniques, and quality control measures that ensure optimal performance.
Furthermore, it highlights the importance of selecting the right tools and equipment, as well as effective troubleshooting strategies to address common machining challenges.
With the Invar alloy market poised for significant growth, this comprehensive guide equips professionals with the insights necessary to navigate its complexities and leverage its advantages in their manufacturing processes.
Understanding Invar: Properties and Applications in Precision Machining
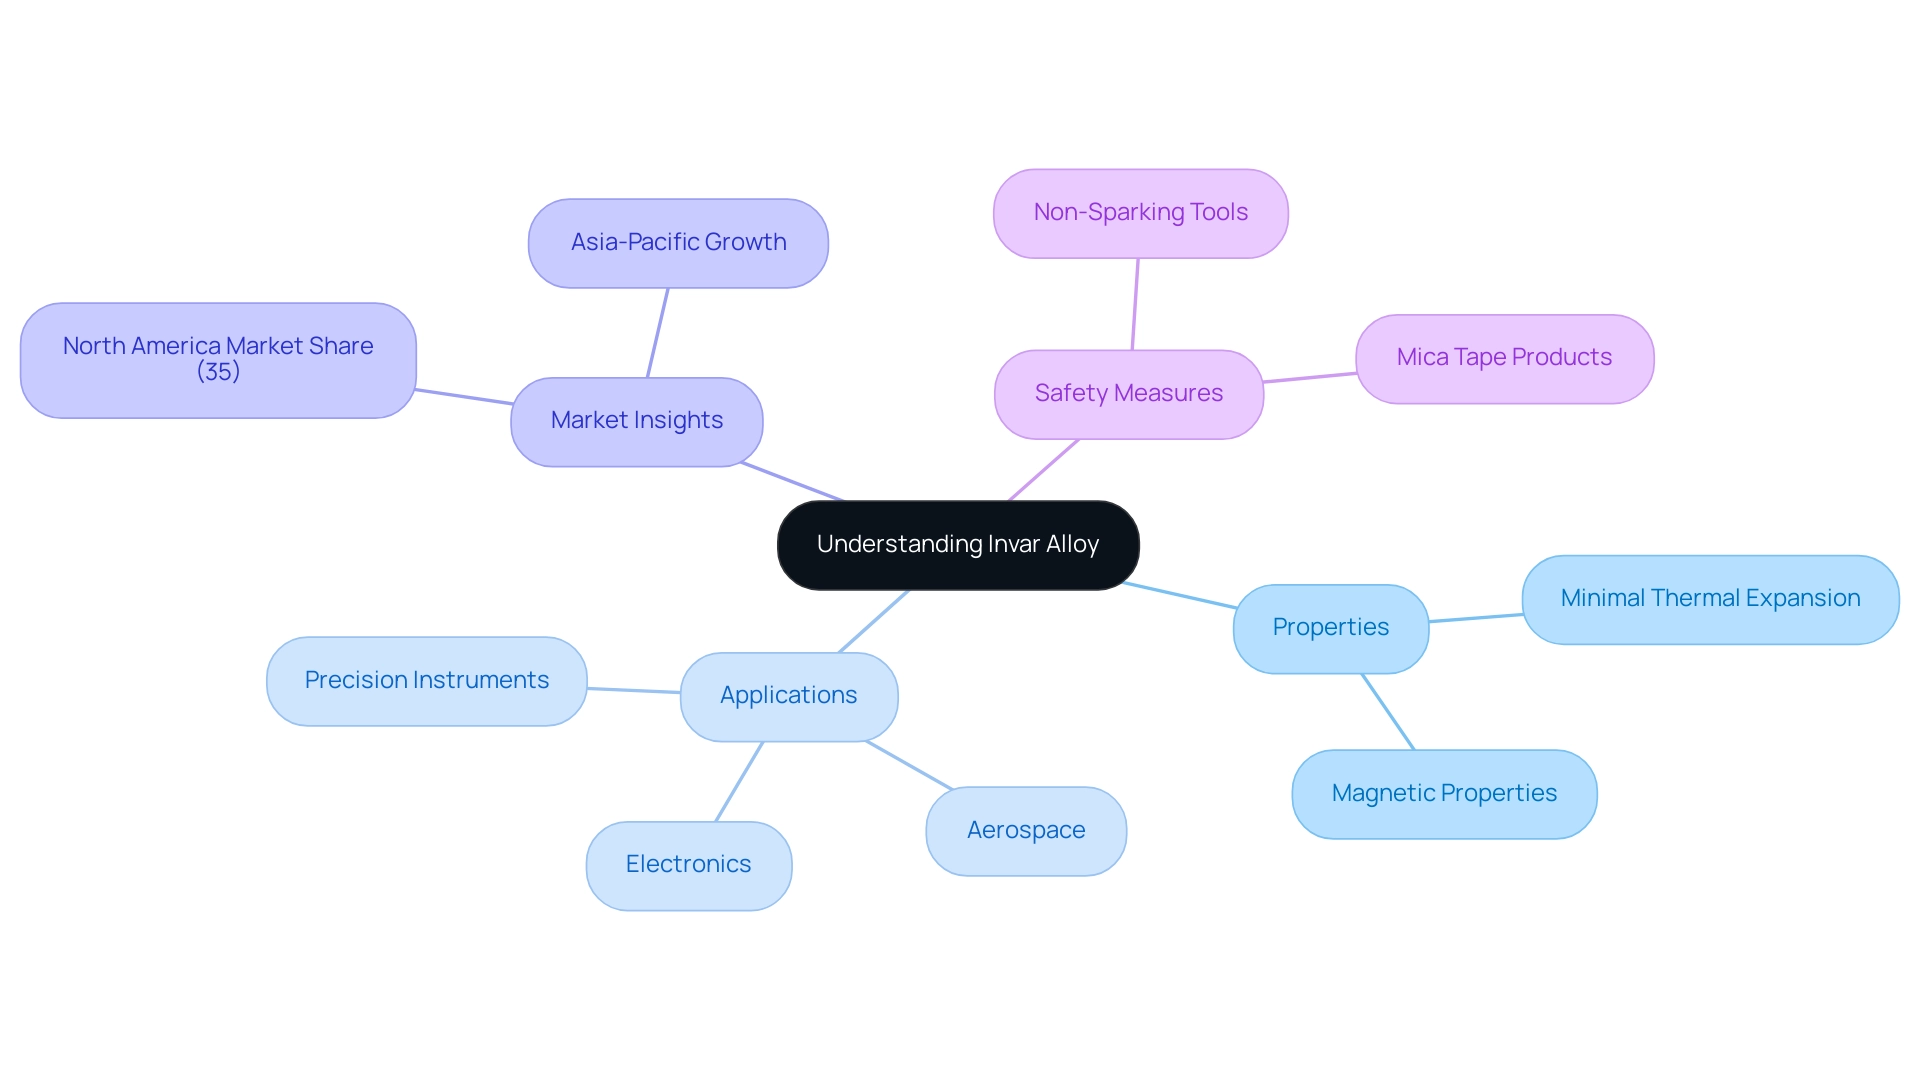
This alloy, primarily composed of iron and nickel, is distinguished by its exceptional property of minimal thermal expansion, critical in precision applications. This characteristic makes it an invaluable material for invar machining, especially in the manufacturing of precision instruments and components in the aerospace and electronics sectors. The alloy’s unique magnetic properties enhance its suitability for applications requiring invar machining, which demands high dimensional accuracy and stability amid temperature fluctuations.
Moreover, in environments with explosive potential, utilizing Non-Sparking Tools is paramount to ensure safety and compliance, as these tools effectively mitigate ignition risks. Key suppliers and manufacturers of electrical insulation and high-temperature materials, including mica tape products, play a crucial role in providing the necessary materials for safe and efficient operations. According to market analysis, North America is anticipated to dominate the alloy market with a 35% share, highlighting its significance in the industry.
Furthermore, the Asia-Pacific region is anticipated to witness the fastest growth, driven by booming electronics and automotive industries. As Pavel Uncuta, a notable digital marketing strategist, aptly noted, ‘The Alloy market is set for some serious growth from 2024 to 2031!’ Exciting times ahead for innovation and technology.
For procurement professionals, a comprehensive understanding of these properties, along with knowledge of reliable suppliers and the importance of mica tape products for high-temperature resistance and electrical insulation, is essential, as they directly influence the selection of processing parameters and methods for invar machining, ensuring optimal performance in precision operations while considering safety with Non-Sparking Tools.
Techniques and Best Practices for Machining Invar with Precision
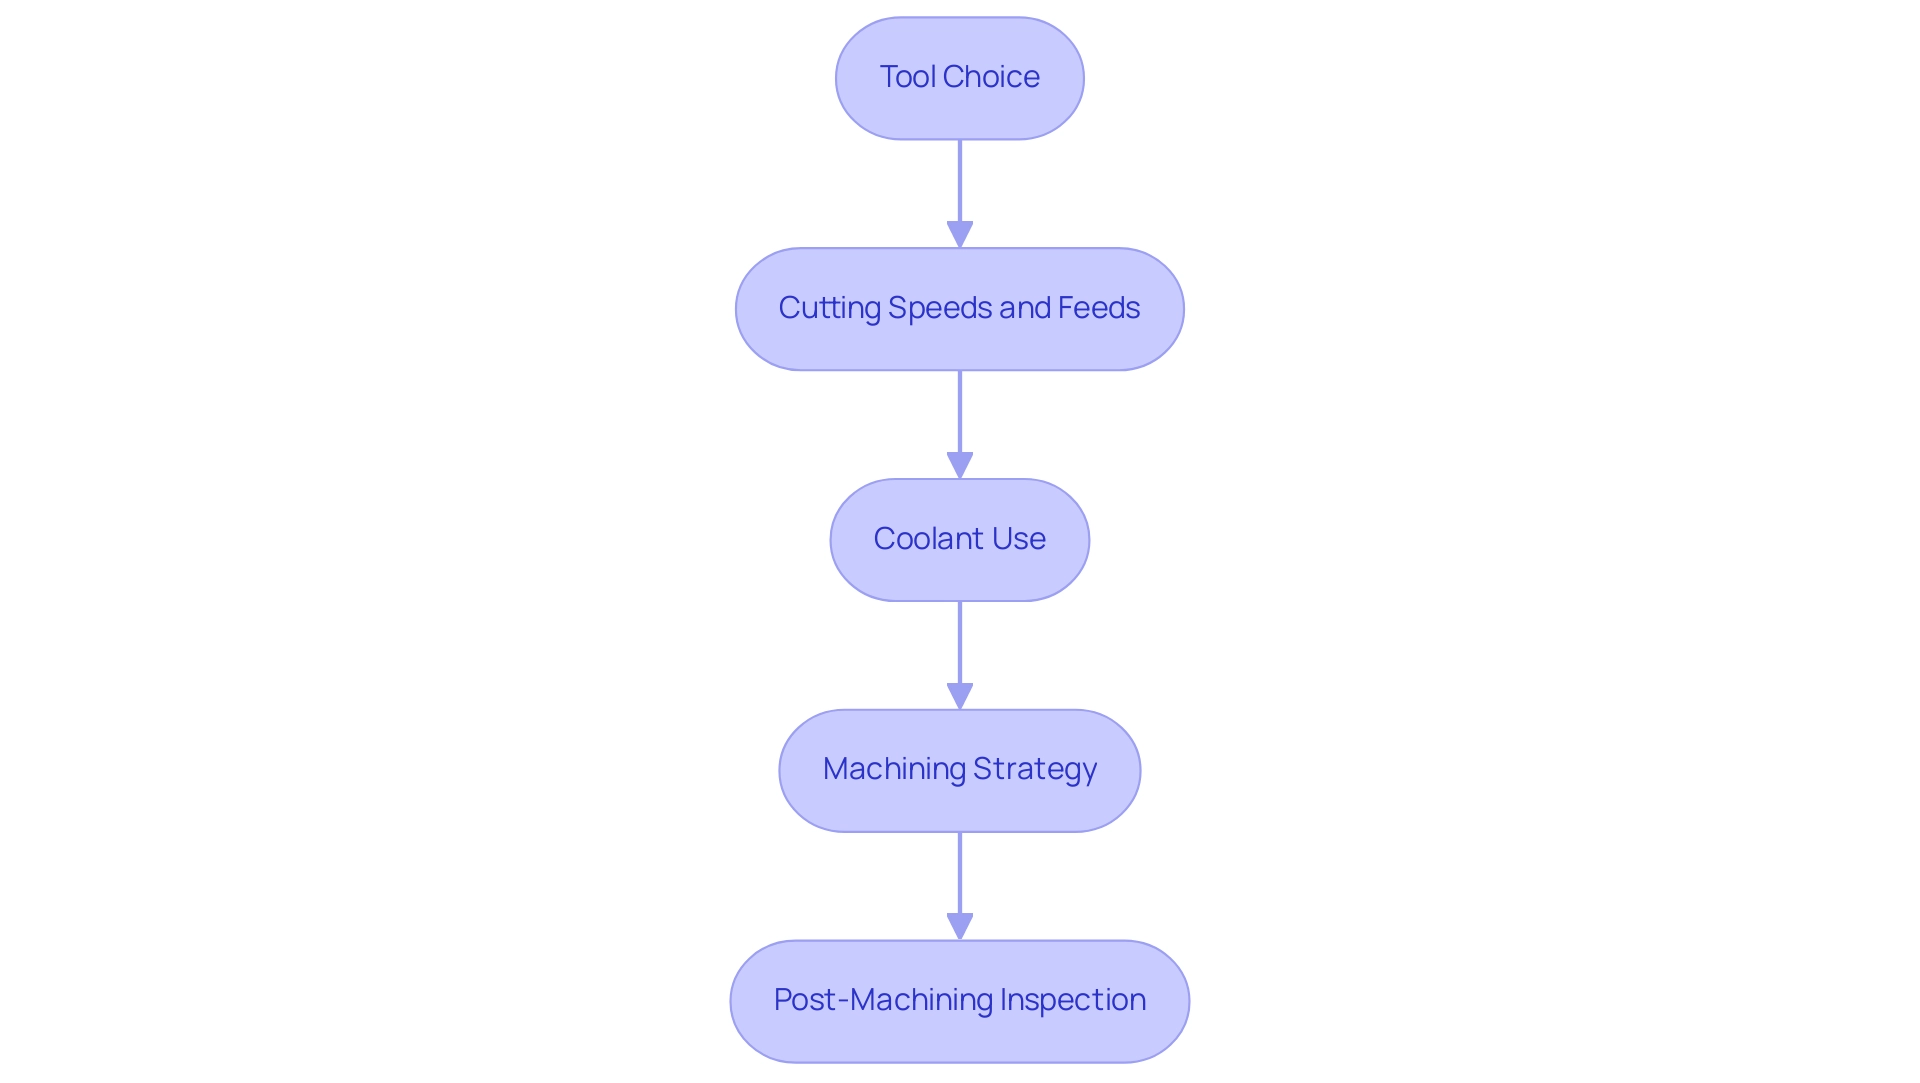
Invar machining of this alloy necessitates careful selection of cutting implements and strategic parameters to reduce wear and ensure precision. Here are essential best practices to follow:
Tool Choice: Employ high-speed steel (HSS) or carbide instruments specifically crafted for precision work.
The application of coated implements can enhance performance by reducing friction and improving wear resistance, making them ideal for managing the unique characteristics of a specific alloy.Cutting Speeds and Feeds: Initiate machining with lower cutting speeds, gradually adjusting them based on equipment performance. Typical speeds for roughing operations range from 50 to 100 surface feet per minute (SFM), while finishing can be executed at speeds up to 200 SFM, optimizing surface quality.
Coolant Use: Implement effective cooling methods during invar machining to mitigate overheating, as Invar can lose its hardness at elevated temperatures. It is crucial to ensure that the instrument is heavy enough to dissipate generated heat and to check the cutting fluid, which may need to be adjusted if it is too rich in sulfur-base oil. Water-soluble coolants are frequently favored for their superior cooling abilities, ensuring the equipment and material remain at an appropriate temperature.
Machining Strategy: Employ climb milling rather than conventional milling to enhance surface finish and minimize tool wear. A rigid fabrication setup is essential for maintaining stability and precision, thereby enhancing the standard of the processed components.
Post-Machining Inspection: Conduct thorough inspections of machined components to verify dimensional accuracy and surface finish. Regular standards control is essential, especially in precision applications where tolerances are strict.
By adopting these best practices, experts can greatly enhance their processes for invar machining of this material, resulting in improved precision and superior excellence in the final products. As highlighted by industry specialists, thermally induced equipment distortion can be minimized by controlling heat up and cool down during full anneal heat treatment, reinforcing the significance of temperature management throughout the manufacturing process.
Moreover, recent case studies on milling specific alloys reveal that using carbide inserts with particular cutter types, such as helical or spiral cutters, can dramatically enhance surface finish and reduce chatter. These outcomes highlight the influence of appropriate equipment selection on processing results, showing that the right techniques can greatly enhance the quality of the worked surface and minimize chatter during the milling procedure.
Furthermore, understanding the elemental composition of this alloy, including a typical analysis of Copper at 0.08 and key points such as Carbon (0.15 min), Nickel (36.0 nominal), and others, provides a more comprehensive understanding of its properties and aids in selecting the appropriate processing parameters.
Selecting the Right Tools and Equipment for Invar Machining
Selecting the appropriate tools and equipment for machining Invar requires careful consideration of several key factors:
Historical Context: Certain alloys have been historically utilized in applications such as light bulbs, thermostats, and military equipment. Understanding these applications underscores the material’s significance in various fields and its continued relevance in modern manufacturing.
Tool Material: It is essential to choose robust materials such as high-speed steel (HSS) or carbide for tooling. These materials are recognized for their durability and capacity to withstand the stresses faced during the processing of certain alloys, guaranteeing an extended lifespan for equipment.
Tool Geometry: The shape of the tool significantly influences cutting efficiency. Features such as sharp cutting edges and optimized rake angles are critical in enhancing cutting performance while minimizing the risk of workpiece deformation—a crucial aspect when dealing with the unique thermal expansion properties of this material.
Thermal Management: When processing this specific alloy, it is important to note that the material can reduce heat approximately 10°C per minute after the heat cycle. This characteristic should be considered when planning processing operations to ensure effective thermal management.
Machine Type: CNC centers are particularly advantageous for precision work in invar machining, providing superior control over cutting parameters. It is essential that these machines are equipped with a rigid setup to maintain dimensional accuracy throughout the manufacturing process.
Measuring Instruments: Utilizing precision measuring devices, such as calipers and micrometers, is crucial for accurate monitoring of dimensions during processing. This precision is vital for maintaining the integrity of components made from a specific alloy, especially given its applications in environments requiring strict tolerance levels.
Maintenance: Regular upkeep of both tools and machinery is crucial for ensuring consistent performance and extending the lifespan of equipment used in machining. This proactive approach not only enhances operational efficiency but also reduces the likelihood of unexpected downtimes.
Expert Insight: Charles-Edouard Guillaume, the creator of this alloy, once stated, “This alloy has been so important to scientific advancement that it earned the Nobel Prize in 1920 for its inventor, Charles-Edouard Guillaume, the first and only scientist in history to be so honored for a metallurgical achievement.” This underscores the scientific significance of the material and its contributions to technology.
Case Study Reference: A relevant case study titled “Fabrication and Stress Relief of Alloys” illustrates that while these alloys can be cold headed and formed, fabrication can induce stresses that affect thermal expansion behavior. Annealing and stress-relieving treatments are necessary to ensure dimensional stability. To maintain structural uniformity, parts may require annealing at high temperatures, with precautions taken to prevent oxidation, ensuring they meet design requirements after fabrication.
In summary, effective tool selection and equipment maintenance are foundational to successful processing of the material. These practices not only reflect best practices in manufacturing but also align with the latest trends in CNC processing, emphasizing the importance of precision and reliability in production.
Quality Control Measures for Machined Invar Parts
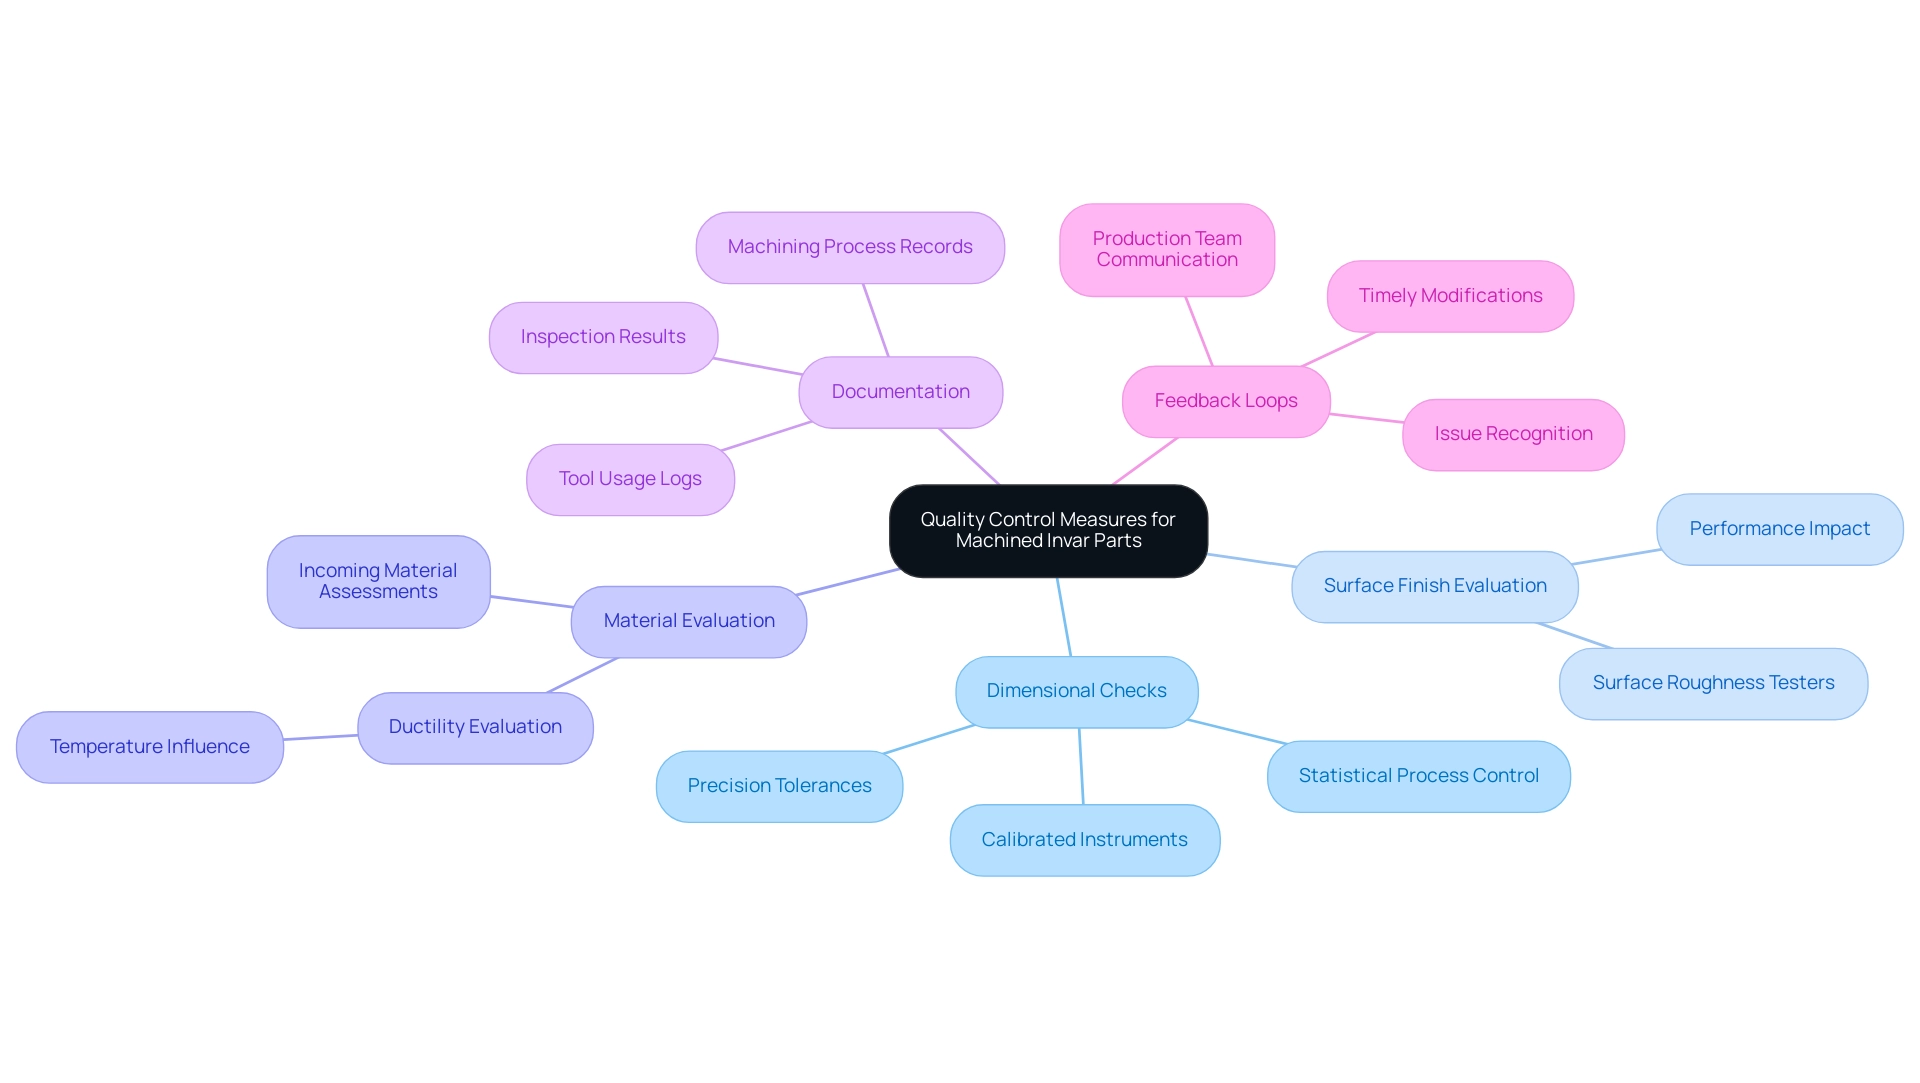
Effective quality control in invar machining is essential to ensure the production of high-precision components. Key practices include:
Dimensional Checks: Regular dimensional checks are vital in maintaining compliance with specified tolerances.
Utilize calibrated measuring instruments and statistical process control (SPC) techniques to oversee manufacturing processes. Recent developments emphasize that consistent dimensional accuracy is crucial, with studies indicating that precision machining can achieve tolerances within ±0.01 mm. This level of precision is critical for maintaining the integrity of components made with invar machining, which are often used in applications requiring stringent dimensional specifications.Surface Finish Evaluation: The surface finish of machined components should be rigorously assessed using surface roughness testers. Following specified requirements is essential, as surface condition directly influences the performance and longevity of precision applications.
Material Evaluation: Before processing, performing comprehensive incoming material assessments confirms that the alloy fulfills the necessary composition and standards.
This step is essential in guaranteeing that the characteristics of the alloy, such as its low thermal expansion and high strength, are maintained throughout the processing. For example, the ductility evaluation using ITT emphasizes how temperature influences material characteristics, which is essential for control in invar machining.Documentation: Maintaining meticulous records of machining processes, tool usage, and inspection results is essential for traceability and facilitates continuous improvement efforts.
Documentation practices support compliance with industry standards and enhance overall process reliability.Feedback Loops: Creating feedback loops with the production team enables the early recognition of issues and timely modifications to uphold standards.
By promoting transparent communication, teams can swiftly tackle any discrepancies from anticipated results, ensuring that control measures are consistently maintained.
These practices not only improve the standard of machined alloy parts but also aid in operational efficiency and customer satisfaction. As W. Xiong pointed out, the significance of control measures in metal processing cannot be overstated, as they are crucial in guaranteeing the success of manufacturing procedures. Implementing stringent quality control measures fosters a culture of continuous improvement and innovation in the processing of materials.
Troubleshooting Common Machining Issues with Invar
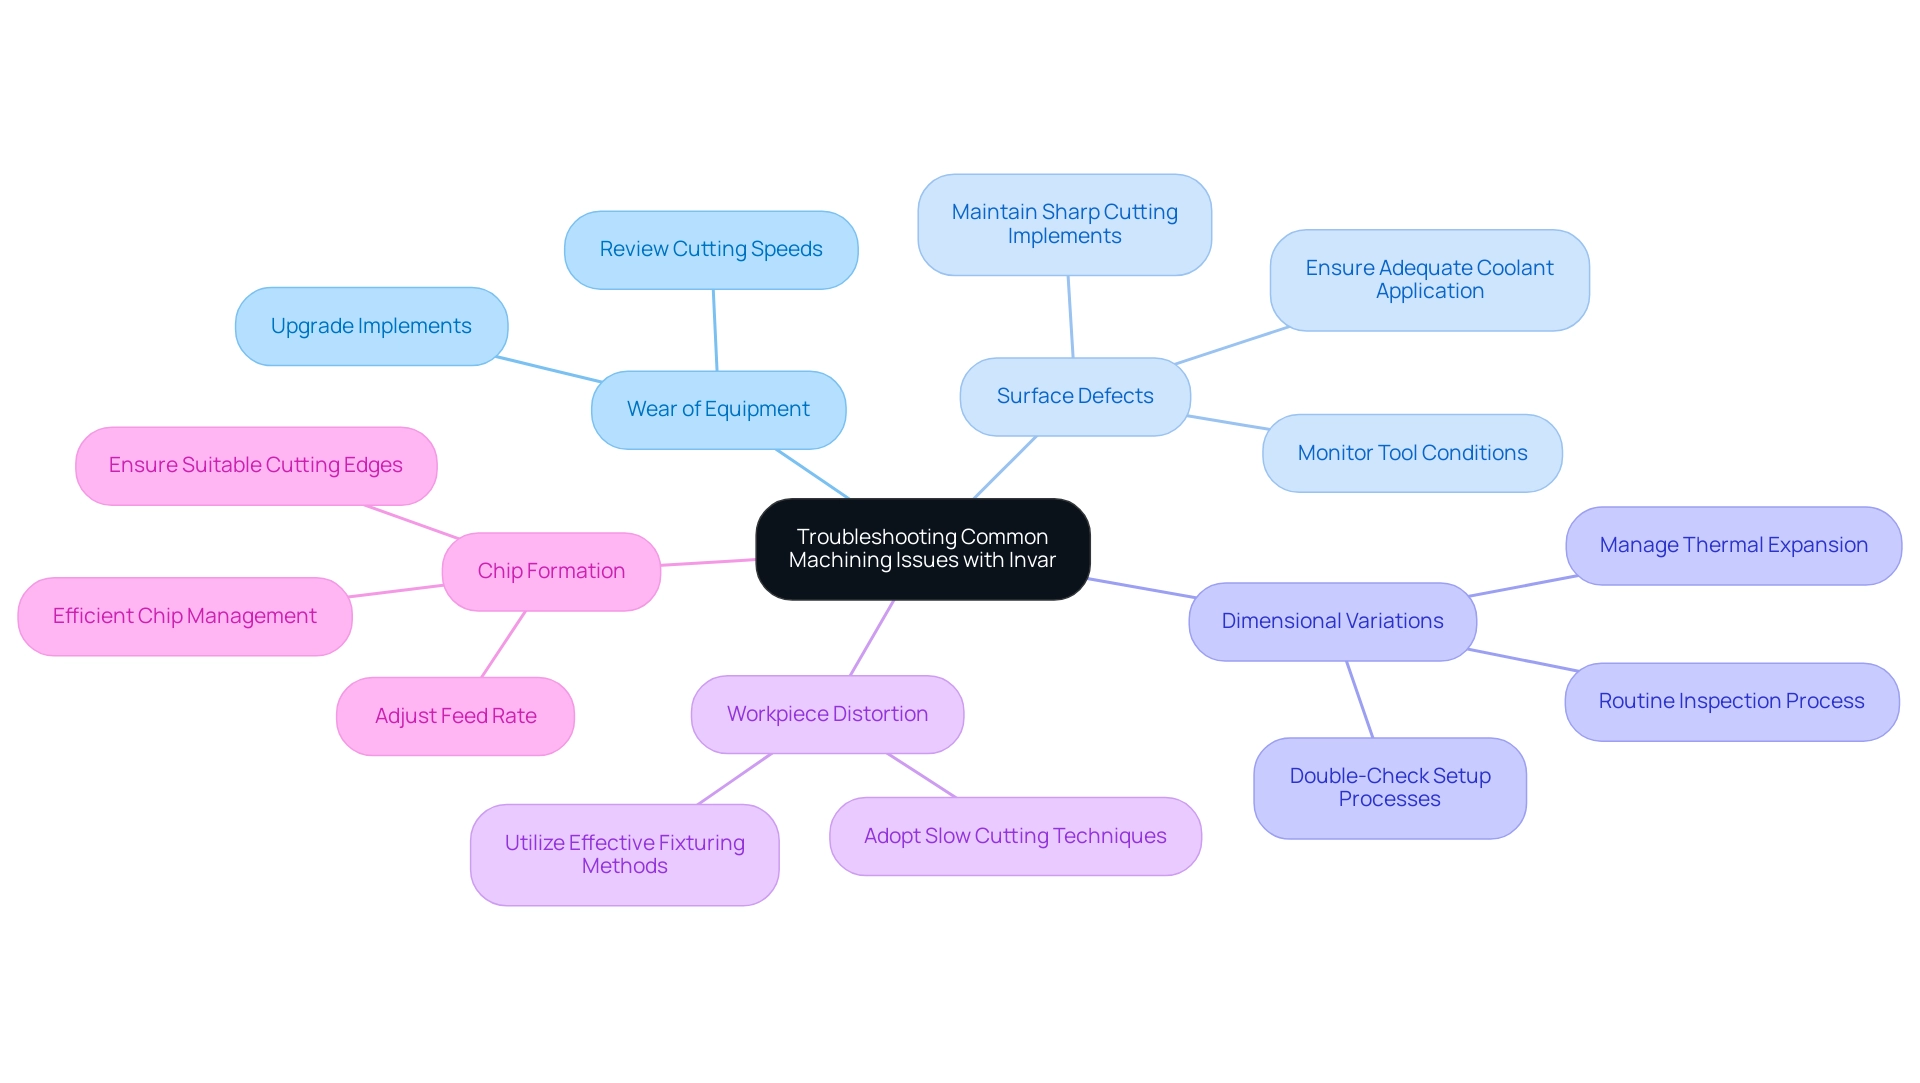
Machining invar presents distinct challenges that require careful consideration and strategic approaches. Here are some of the most common issues encountered, along with effective troubleshooting tips:
Wear of Equipment: Excessive wear of instruments is a prevalent concern when working with Invar. It is essential to review cutting speeds and feed rates to ensure they are suitable for invar machining. If wear continues to be a concern, consider upgrading to higher-quality coated implements designed for enhanced durability and performance.
Surface Defects: Surface defects often stem from improper machining parameters. Maintaining sharp cutting implements and ensuring adequate coolant application is critical to prevent overheating, which can negatively impact surface finish quality. Additionally, surface morphology issues such as fiber pull out in the upper CFRP phase and matrix degradation in the lower CFRP phase can exacerbate surface defects. Regular monitoring of tool conditions can help mitigate these risks.
Dimensional Variations: Changes in dimensions can present considerable challenges during processing. Improper annealing can lead to invar machining problems, with Invar expanding up to ten times beyond allowable limits, which emphasizes the importance of managing thermal expansion. To combat dimensional variations, double-check setup processes and verify that the machine tool is accurately calibrated. Implementing a routine inspection process during production is vital for early detection of deviations, thereby ensuring consistent quality.
Workpiece Distortion: Distortion can occur due to thermal stresses during manufacturing operations. To minimize this effect, adopt slow and controlled cutting techniques that reduce heat generation. Additionally, utilizing effective fixturing methods can help limit movement during processing, thereby preserving part integrity.
Chip Formation: Insufficient chip formation can result in equipment damage and impede processing efficiency. To enhance chip removal, adjust the feed rate accordingly and ensure that the cutting edges are suitable for the material. Efficient chip management is essential for extending tool life and enhancing performance.
A case study on the thermal expansion of alloy 36 highlights the importance of proper annealing to prevent significant dimensional changes. In situations where annealing is inadequate, invar machining can result in Invar expanding up to ten times beyond the allowable limits, highlighting the need for meticulous attention to processing parameters. As noted by industry expert Jeff, “Thanks Fine grain, that sounds fairly logical.
Maybe the shape of the crystals changes a little bit?” This insight underlines the critical nature of understanding material behavior, particularly related to surface morphology issues and machining processes.
Conclusion
Understanding the complexities of Invar is paramount for professionals engaged in precision machining. The alloy’s unique properties, such as minimal thermal expansion and exceptional magnetic characteristics, make it indispensable in sectors that demand high accuracy and stability. Selecting the right tools and equipment, as well as implementing effective machining techniques and quality control measures, ensures optimal performance and adherence to stringent tolerances.
By following the best practices outlined, including careful tool selection, strategic machining parameters, and robust quality control processes, manufacturers can significantly enhance the quality of their Invar components. Addressing common machining challenges through proactive troubleshooting not only improves operational efficiency but also contributes to overall product integrity.
As the Invar alloy market continues to grow, staying informed about its properties and best practices will empower procurement managers and engineers to make strategic decisions that leverage its advantages. Embracing these insights positions organizations to thrive in an increasingly competitive landscape, ensuring that they remain at the forefront of innovation and precision in manufacturing.

