Blogs
How Thermostatic Bimetals Are Made: From Raw Metals to Precision Strips
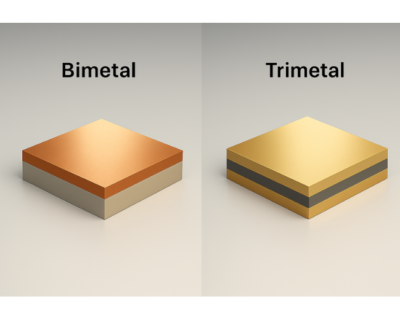
Two metal sheets. One smart result.
What powers your thermostat, circuit breaker, or fire alarm starts with a precise manufacturing process—not guesswork.
In this post, we reveal how thermostatic bimetals are made—from material selection to bonding, forming, and final checks.
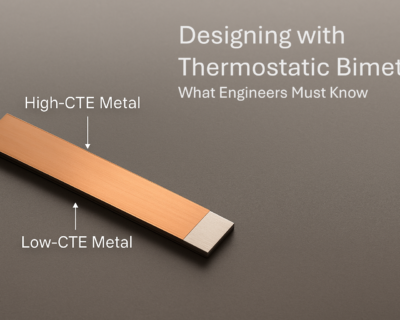
Simple metals. Engineered intelligence.mart, silent workhorses in countless applications.
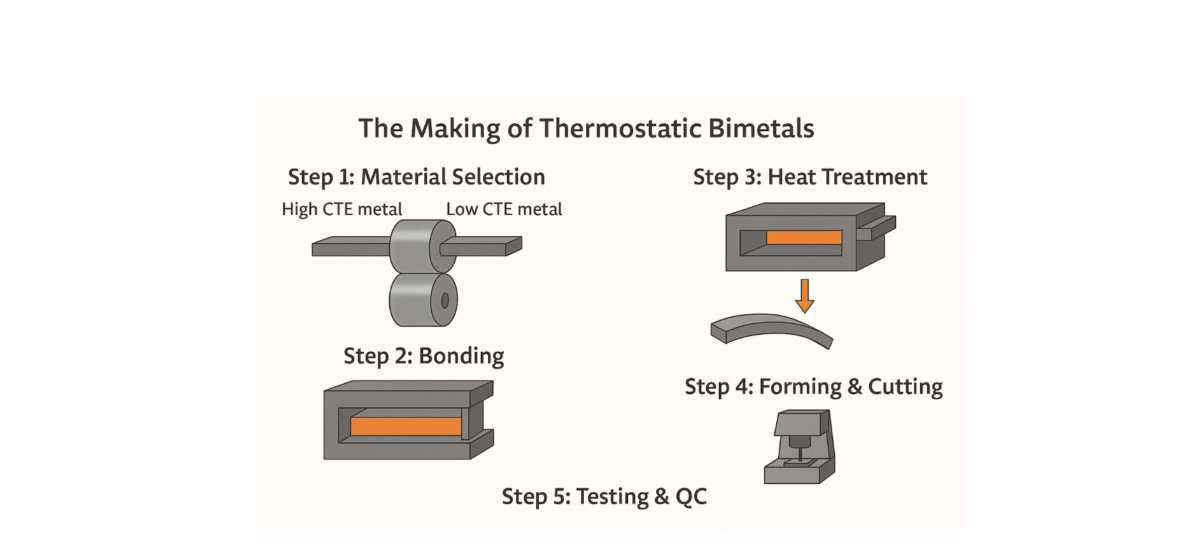
Step 1: Material Selection – The Foundation of Performance
The first and most important step is choosing the right metal pair. These must have:
- Different coefficients of thermal expansion (CTE)
- Compatible mechanical and bonding properties
- Desired corrosion and fatigue resistance
Common Material Combinations:
| High CTE Metals | Low CTE Metals |
| Copper | Iron-Nickel |
| Brass | Stainless Steel |
| Nickel Alloys | Carbon Steel |
⚠️ Goal: Maximize deflection while maintaining long-term stability
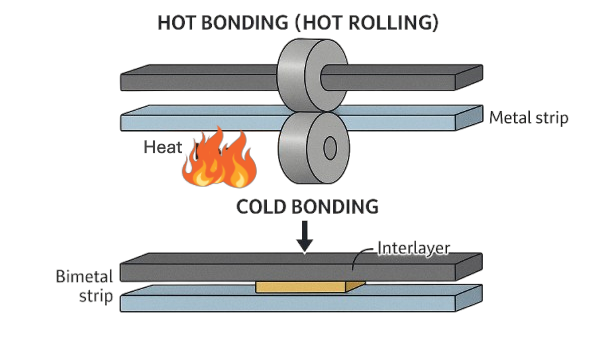
Step 2: Bonding the Layers – Creating a Thermal Couple
The two metal sheets are permanently joined using one of several bonding methods:
Hot Bonding (Hot Rolling)
- Metal sheets are heated and pressed together using high-pressure rollers
- Forms a metallurgical bond without adhesives
- Suitable for most standard bimetal strips
Cold Bonding
- Uses room-temperature pressure and deformation
- Often requires an interlayer or surface prep
- Best for thin strips and certain alloys
Welding / Brazing
- Used in specialized or custom-shaped bimetals
- Allows precise bonding in specific sections or complex geometries
Bonding quality directly affects lifespan, fatigue resistance, and sensitivity
Step 3: Heat Treatment – Stress Relief and Stabilization
After bonding, the strip undergoes heat treatment to:
- Relieve internal stress from rolling or welding
- Set mechanical memory and temperature thresholds
- Improve elastic behavior and reduce warping
Common heat treatment techniques include:
- Annealing
- Normalizing
- Controlled cooling under inert atmosphere
🔄 This step ensures consistent bending behavior across millions of thermal cycles
Step 4: Forming and Cutting – Tailoring the Response
Once stabilized, the bonded strip is shaped for its final application:
- Flat strips → used in thermostats and overload switches
- Coiled spirals → used in dial thermometers or valves
- Domed discs → used in snap-action applications like fire alarms
Precision cutting tools (laser, die, or water jet) are used to:
- Define exact length and shape
- Punch mounting holes or connection points
- Maintain surface smoothness and edge integrity
Step 5: Testing & Quality Control – No Room for Error
Every batch is subjected to rigorous tests, including:
- Thermal Deflection Testing – Measuring curve per °C
- Bond Integrity Checks – Ensuring no delamination
- Fatigue Testing – Simulating long-term use
- Dimensional Tolerance Checks – Critical for mounted assemblies
Adherence to standards like:
- ASTM B106
- ISO 10318
is a must for industrial and aerospace-grade products.
Only strips that pass every test are shipped out for integration into devices.
Summary: The Making of a Bimetal Strip
| Stage | Purpose |
| Material Selection | Choose metals with different CTE values |
| Bonding | Create a strong, reliable, metallurgical bond |
| Heat Treatment | Relieve stress and stabilize mechanical properties |
| Forming & Cutting | Shape the strip for its intended function |
| Testing & QC | Ensure consistency, durability, and compliance |
🔗 Coming Up in Blog 4: Testing Thermostatic Bimetals
In the next blog , we explore how these strips are tested—under pressure, through heat cycles, and beyond—so they never fail when it matters most.
Got questions? or got an ideas—we’re always ready to dive deeper!
Contact our experts today!
Talk to: Er.Pankaj Domadia | Kairav Domadia | Aadil Domadia | Pragati Sanap | Pooja N N | Shivani Kanojia
Read our previous blog on https://domadia.net/thermostatic-bimetal/how-thermostatic-bimetals-works/